What This Covers
How to finalize your blog post, adjust settings, and publish it directly to your WordPress website, Blogger, and connected social media accounts — all in a single workflow.
Who Should Use This
Anyone who wants to:
- Publish posts directly to WordPress or Blogger
- Share posts automatically to Facebook, LinkedIn, or other connected social accounts
- Control featured images, tags, categories, and video embeds in one place
✅ Step-by-Step Instructions
1️⃣ Set Your Featured Image

- Click on Featured Image in your post editor.
- Upload your own image or use an AI or stock image (recommended for copyright safety).
- Once uploaded, your featured image will appear in the post preview and on your live blog.
2️⃣ Adjust Your Post Tags
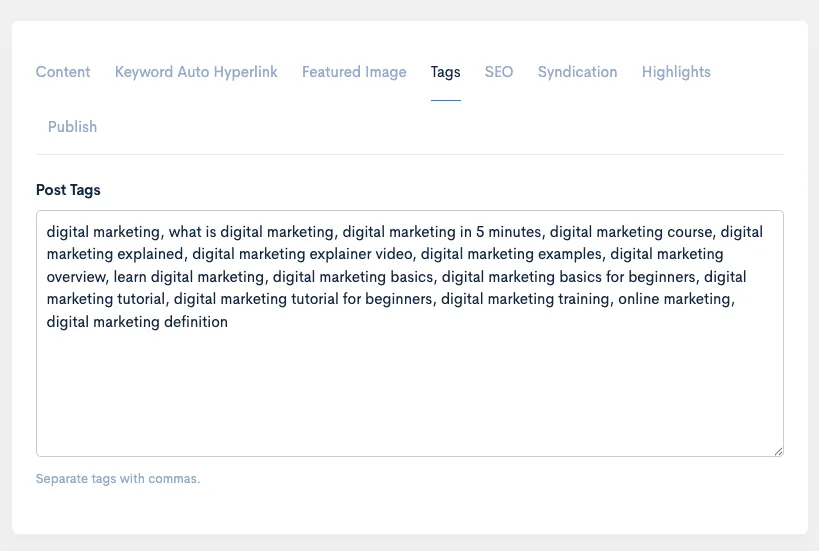
- Add relevant post tags— these help with:
- Improving on-site search
- Giving search engines better context for ranking
- If your post was created from a YouTube video, default tags are often auto-generated for you.
- Edit or add new tags to match your SEO goals.
3️⃣ Set Up Social Media Syndication
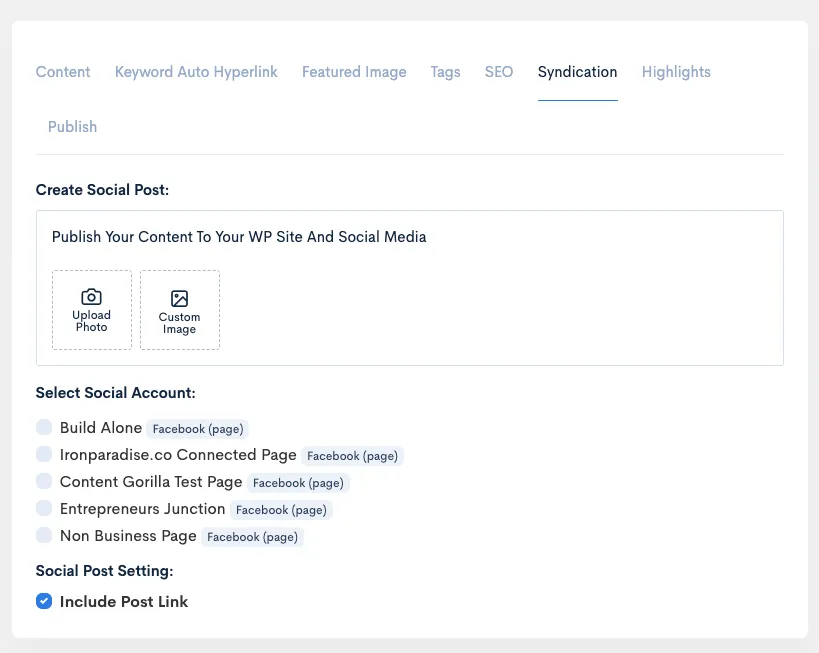
- Go to the Syndication section in your post editor.
- Write or adjust the titleyou’d like to share on your social posts.
- Keep it short for platforms like Twitter which have character limits.
- Upload a custom social sharing image if you’d like.
- Select which social accountsyou want to publish to.
- Note: If you haven’t connected your social media yet, go to Settings → Integrations and link your accounts first.
4️⃣ Configure Final Publishing Options
- Improving on-site search
- Giving search engines better context for ranking
- Go to the Syndication section in your post editor.
- Write or adjust the titleyou’d like to share on your social posts.
- Keep it short for platforms like Twitter which have character limits.
- Upload a custom social sharing image if you’d like.
- Select which social accountsyou want to publish to.
- Note: If you haven’t connected your social media yet, go to Settings → Integrations and link your accounts first.

- Click Publish to open final settings.
- Select your website (WordPress or Blogger).
- Choose your post status:
- Publish (to make it live immediately — required for syndication to work)
- Draft (if you don’t want it live yet — but note this won’t push to social media)
- Pick a category — or create a new one if needed.
- Choose whether to include the featured image.
- Choose whether to embed the original video (useful if your post was created from YouTube).
- When ready, click Publish.
5️⃣ Check Your Published Post
- After a few moments, your post will:
- Go live on your WordPress or Blogger site
- Be shared on your connected social media pages or profiles
- To view it:
- Go to Post Archive inside your app.
- Find your post and click Go To Post — this opens your live post on your site.
- Your published page will include:
- The featured image
- Embedded video (if selected)
- Hyperlinks, keywords, CTAs — all preserved
- Auto-linked text if you’ve set keyword links (great for affiliate promotions)
✅ Pro Tips
- Use custom featured images to avoid copyright issues — tools like Canva are great for quick graphics.
- Double-check your post status is Publish if you want social media syndication to run.
- Use relevant keywords in your tags to help Google understand your content.
- Syndication works for Facebook Pages, LinkedIn Profiles/Pages, and more.
✅ FAQs
Q: Does this work for non-WordPress websites?
A: Direct publishing is currently for WordPress and Blogger only. For other sites (like Webflow or Wix), export your content manually.
Q: How do I integrate my social accounts?
A: Go to Settings → Integrations and follow the step-by-step instructions for Facebook, LinkedIn, or other platforms.
Q: Can I turn off video embeds?
A: Yes — uncheck Include YouTube Video if you don’t want the original video embedded.
Was this article helpful?
That’s Great!
Thank you for your feedback
Sorry! We couldn't be helpful
Thank you for your feedback
Feedback sent
We appreciate your effort and will try to fix the article